
DIY Disney Mickey Ears
- May 5, 2018
- 5 min read
Hey guys! Today I have a tutorial for you to make these super easy and super cute DIY Disney Mickey Ears! All of the supplies can be found at your local Joann's, Michael's, or Hobby Lobby. The thing I like about these are they are completely customizable with whatever style and theme you want and can typically cost less than ones at the Disney Parks. A bonus is that they are one of a kind and unique to you and no one will ever have the exact same pair as you :)
With that being said, let's get started!
Supplies

To make this project you will need:
-Fabric of your choice for the ears
-Fabric or ribbon for bow
-Hot glue gun and hot glue (I used Gorilla Glue to be safe but regular hot glue works fine)
- A sharpie
-1/4" foam
-Batting or Fiber Fill
-Headband
- Sewing machine or needle and thread
The Process

Print and Cut out your template pieces on a card-stock sheet of paper and lay out to make sure you have 2 Sewing pieces, 1 fabric piece, and 1 foam piece.

Next layout your fabric (making sure that it is doubled up) and trace two ear shapes with the template. Try to trace them as close together as possible while still leaving enough room for them to not touch, this helps save fabric and resources.
Once you've traced your templates cut out your 2 (but really 4) pieces of fabric. I like to pin them together with about two pins each while cutting them out to make sure they stay even and together the whole time. This really helps with more stretchy fabric like the one I am using in the picture above.

Once you have your ears cut out, match them up with RIGHT sides facing together. This will be the side you want to face out. Place your sewing template in the center of the ear and trace making sure to leave a mark where you will leave an opening to turn the fabric right side out and stuff.
Pin the fabric pieces together to ensure that they don't move when sewing or even tracing. Make sure the template is as close to being perfectly center as possible. You don't want uneven sides.

For this next part you can choose to hand stitch it if you don't have a sewing machine or don't feel comfortable free hand stitching. In that case, grab that needle and thread and start sewing on the sewing line being sure to leave an opening.
If you choose to use a sewing machine it is really easy and a lot quicker. Make sure to just move slowly and to not rush it and to follow the black line as precise as possible. You may move off of it at times, just make sure to guide your fabric back to the line. Start at one side of the opening and sew all the way around to the other opening. Once you get to the black tick mark, back stitch to ensure your stitching is secure.
Once you have sewn both ears together, Turn the fabric right side out by turning it through the opening you left, making sure to push out all of the edges to get that distinctive shape.

Now, take your foam and trace and cut two pieces using the template, once again making sure to get as close to the edge and each other as possible while still leaving enough space between to save resources.

Here's the fun part: putting the foam in the little opening of the ears. I found this way to be the easiest way, especially with stiffer fabrics. If you don't do it this way you may have a harder time getting it in, that's just how it works.
Fold your foam into kind of a TACO shape, folding one edge over the other. It's almost like a hybrid of a taco and burrito.

Push your taco burrito through the opening of the ears and flatten the foam once inside. Sometimes it flattens on its own but make sure the foam fills the ears as completely as possible. This is a bit easier with more stretchy fabric but still can be accomplished with more stiffer cotton fabrics.

Now, take your batting or fiber fill and begin stuffing your ears to make them as full and poofy as you wish. You only really need to fill one side as the back is not really seen as much however, if you do wish to fill both sides only add half as much stuffing to the back as you do the front, otherwise it will be more difficult to close up.
Make sure to fill out the shape of the ears as best as possible and get that nice poofy, round shape.


Once filled, Add a line of hot glue to the edge of the foam and fold one edge of fabric over the glue. Hold in place until it is cool enough and secure. Add another line of hot glue on the top of the fabric you just glued down and fold over the remaining edge, pinching down to make sure it is secure.

Layout your ears on the headband where you want them. (I ended up moving mine slightly further apart down the headband). Typically you want them about 2 inches apart on the top or if you have a pair of ears you purchased from a Disney Park feel free to use that as a guide for ear placement.
One thing I do is either mark a line on the edges of each ear so I know where they go, OR I place a pin in the fabric of the headband at each edge of the ears to mark my place where the ears go. Either way works and is just to make sure to save the spot for when you have to glue them down.
Place a line of hot glue on the headband between your markers and firmly place the curve of the ear on the glue. Hold down until glue is dried and ears are firmly secure and in place.
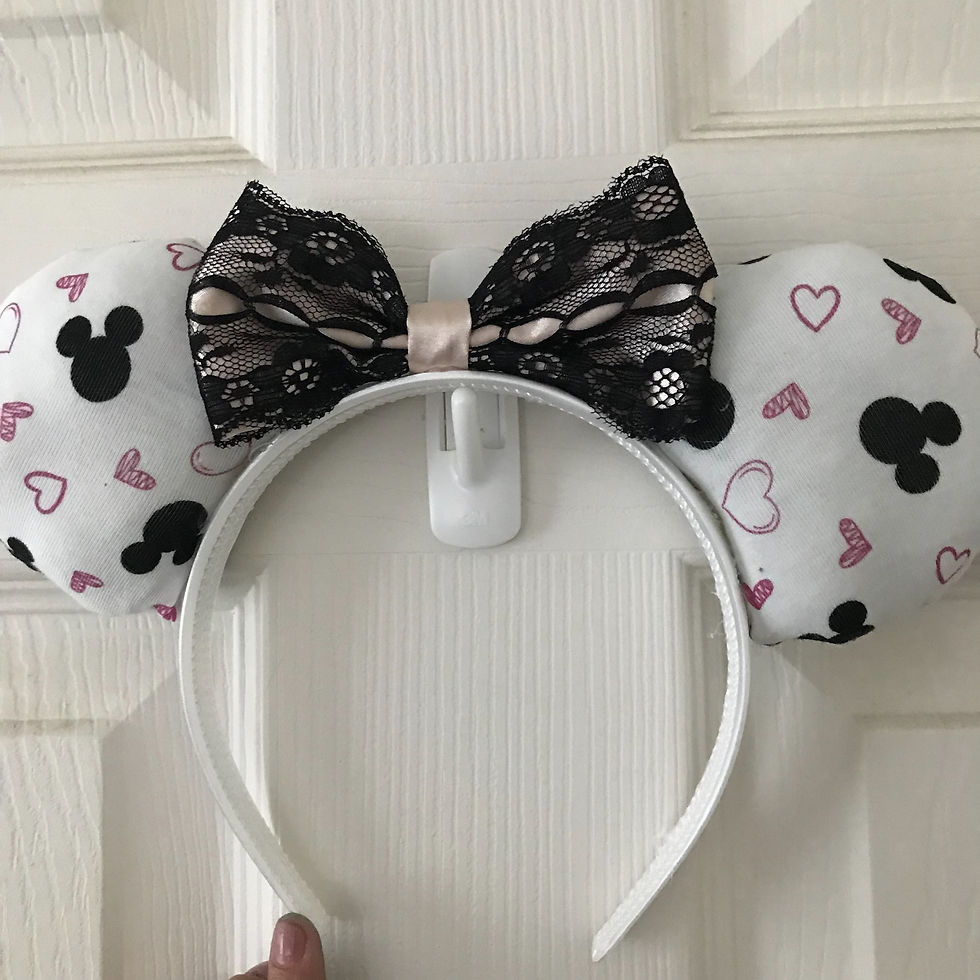
Finally! Add a bow of your choice from either ribbon or fabric that you made and hot glue the center of the bow down on the center of the headband. You can also secure the bottom corner of the bow by placing a dab of hot glue on each corner of the headband and securing it to the ears. If you guys want a tutorial on how I made my bow or want to know how to make a fabric or ribbon bow feel free to leave me a message and I will post a tutorial!
And that's is guys! I hope you enjoyed making these super cute and easy DIY Disney Mickey Ears! Remember you can make these whatever design or theme you want and they will always be unique to you. Happy Crafting and see you next time! Bye lovelies!


Comments